Create Storage Volume
Storage Volume is used for creating multiple logical volumes in a Storage Pool, each logical volume has it’s own spaces and parallel process unit.
There are three volume types:
1. RAW, RAW will allocate all the volume capacity, except of fault recovery, data will not be moved, performance will best, and each volume can be shared by multi-nodes and multi-cores, therefor the volume can use all resources of the cluster to enjoy the extreme high performance.
2. Thin Provisioning Volume, just like its name, it is thin provisioning, space usage will grow up by its being used, this type of volume supports zero-copy snapshot.
3. Log Structured, which supports all feature of thin provisioning volume, and more, the volume space will walk through the whole cluster to bring global wear balance, this is important for Flash medium.
Volume can be export as a SAN interface like iSCSI, iSER (iSCSI RDMA Extension) and NVMe-oF.
Follow the steps below to create a Storage Volume:
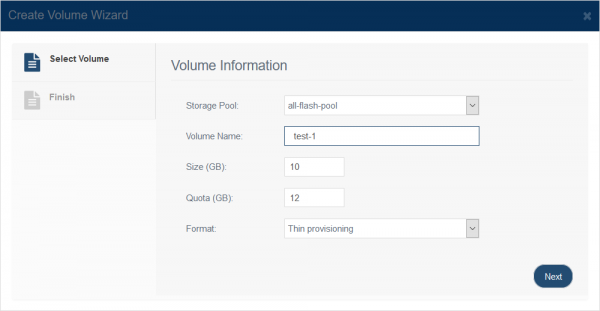
Step 1. Select Volumes in the left panel of the FlexSDS Scale-out Storage Management Platform and click Add link. The Create Volume Wizard shows.

Select per-created Storage Pool
Type Volume Name
Specify Size and Quota, Quota means the volume max used space, including user data and metadata, for RAW volume, the Quota space is always the same as it’s Size, while other type volumes (thin and log structured), since volume need more space for saving metadata and snapshots, will need more space, the space limitation is Quota.
press the Next button to continue.
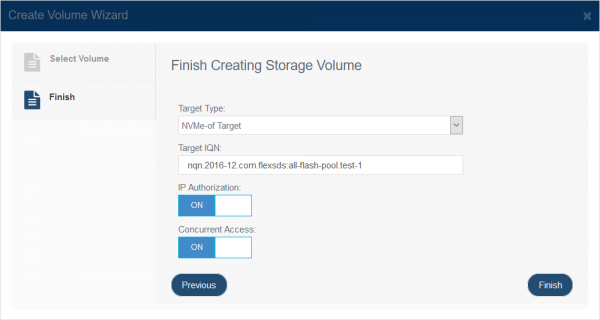
Step 2. Attach SAN devices to the storage volume.

As mentioned earlier, each volume can be exported as iSCSI, iSER of NVMe over Fabrics target, here user can select any one of them, then
Specify Target IQN or NQN for NVMe over Fabrics.
Choose CHAP on or off, not NVMe over Fabrics does not support this authorization method.
Choose IP Authorization on or off
Choose Concurrent Access on or off.
Press the Finish button to complete the storage volume creating.
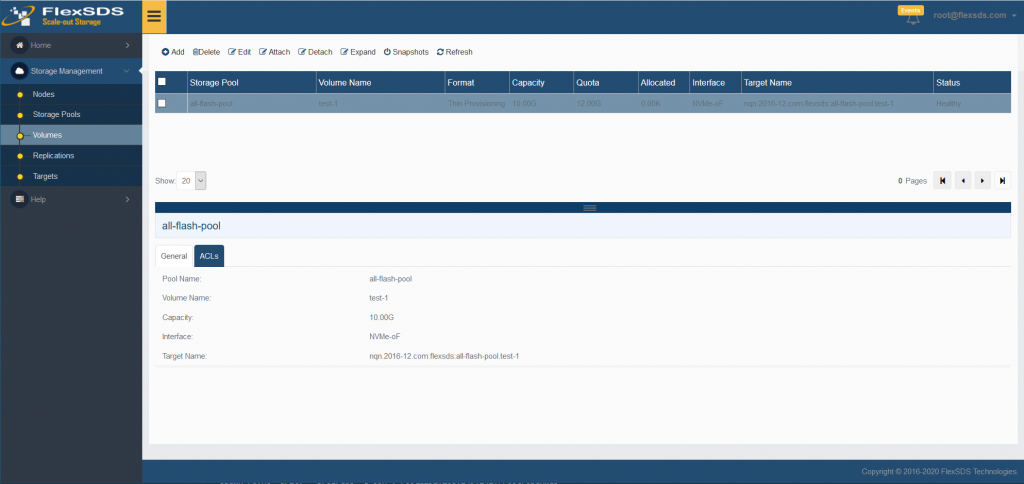
After create the storage volume successfully, it will be shown in the management console as follows:

